
How to Use the SleepImage App & Device
*All patients have 5 days to attempt 2 nights of testing. A minimum of 4–6 hours of recording on 1 successful night is required.
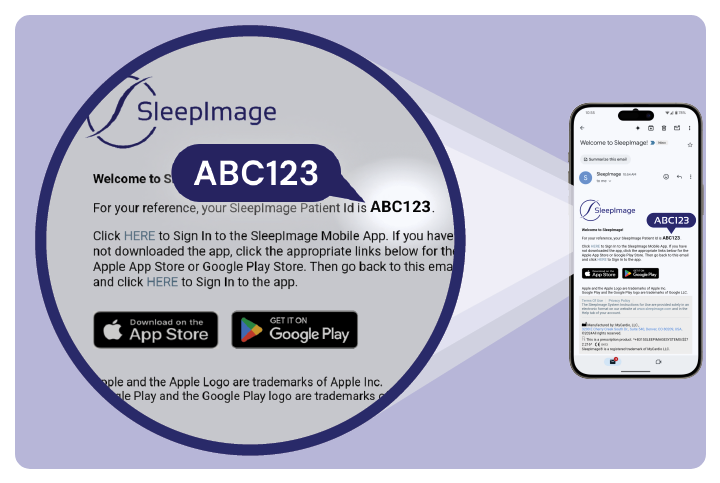
1. Download the SleepImage App
Sleeptest.com emails your Patient ID and links to download the SleepImage App from either the Apple App Store or the Google Play Store. Click on the install button to download the application. (If you cannot find the email, check your spam/junk folder.)
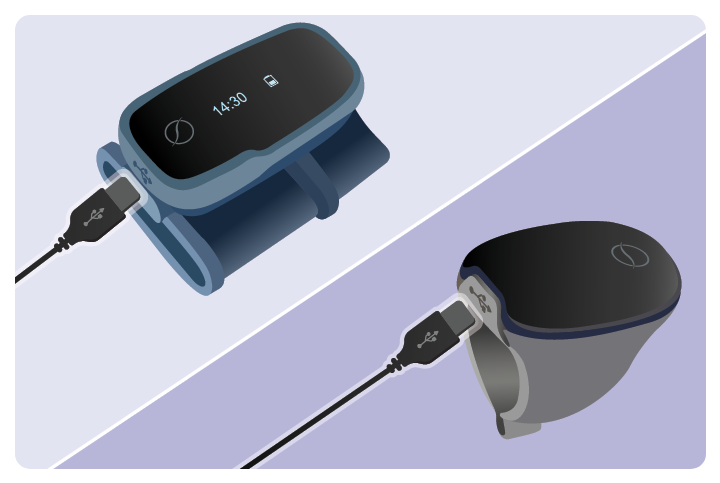
2. Prepare your SleepImage Device
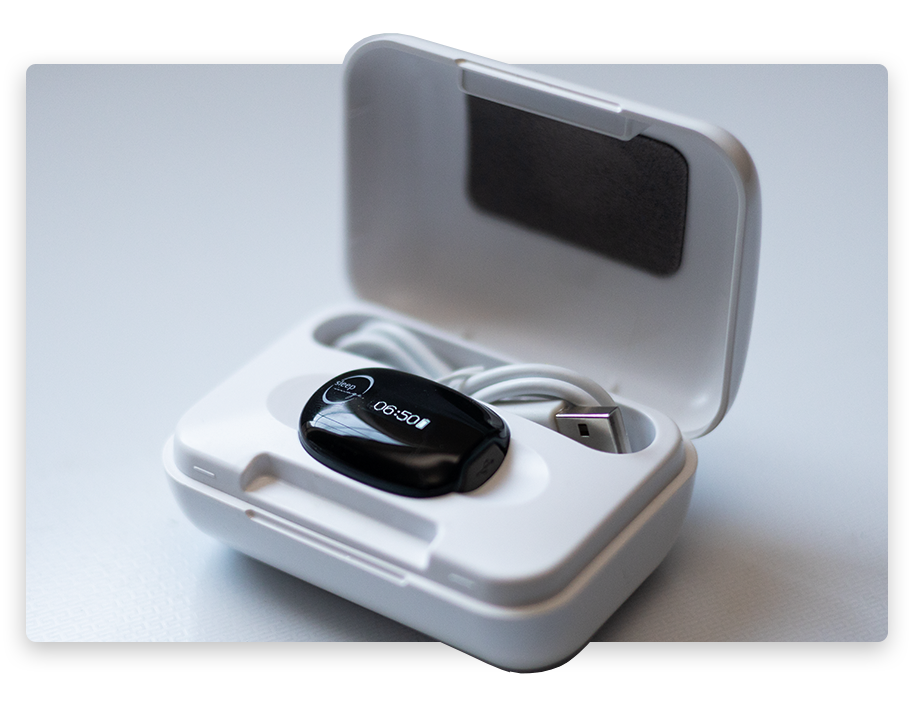
The device should arrive fully charged. Ensure your SleepImage device is fully charged before each night of testing with the provided cable. A full charge will take about 90 minutes.
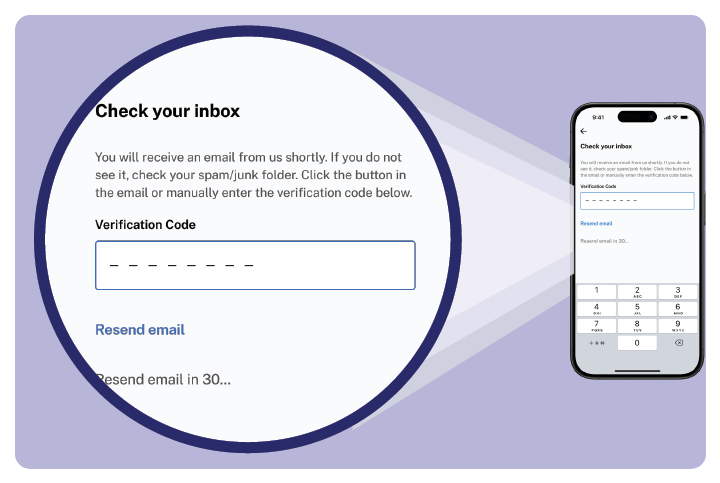
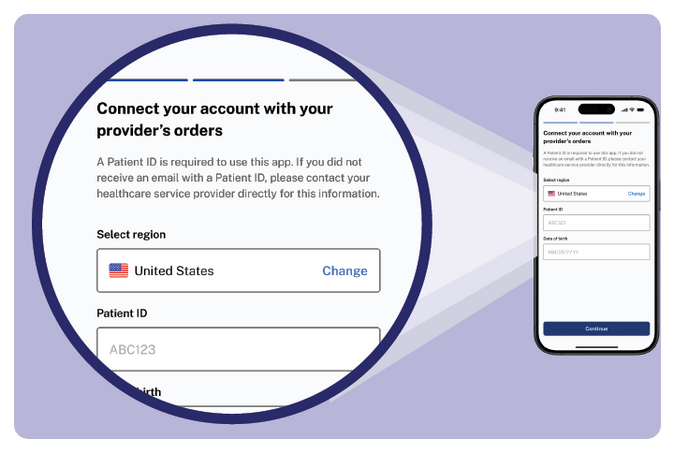
3. Set Your Device Up With the App
Once you have it installed, launch the SleepImage App, accept the End User License Agreement (EULA), and set up your patient account. You may choose to sign in using email, Google, or Apple. For the email option, SleepImage will send you a 6-digit verification code. Enter this code in the App to complete the sign-up process.
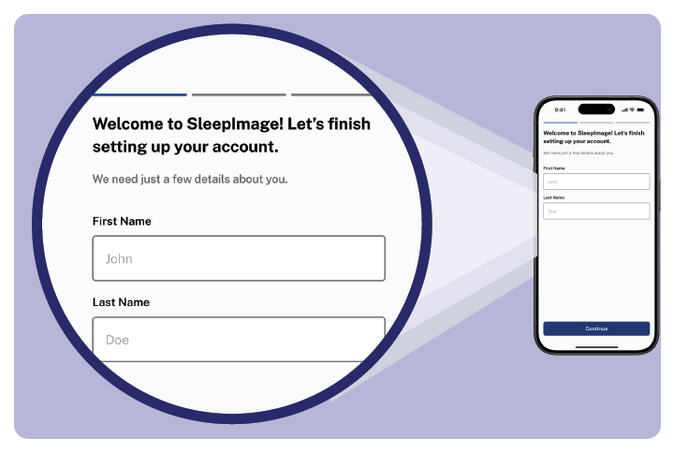
Once you have signed up, you will be asked to enter your name, Patient ID, and Date of Birth (DOB).
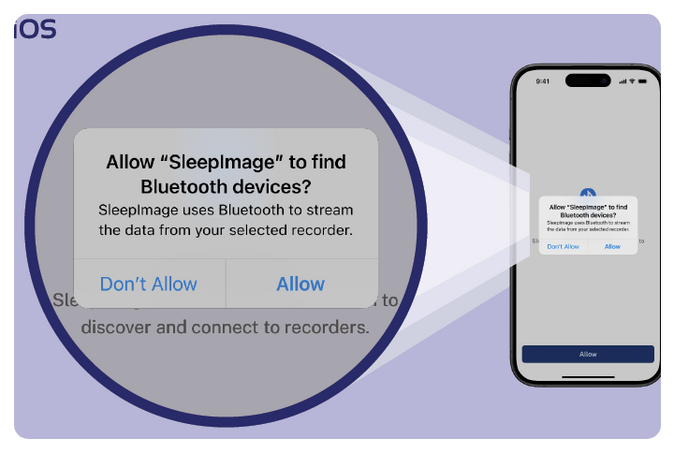
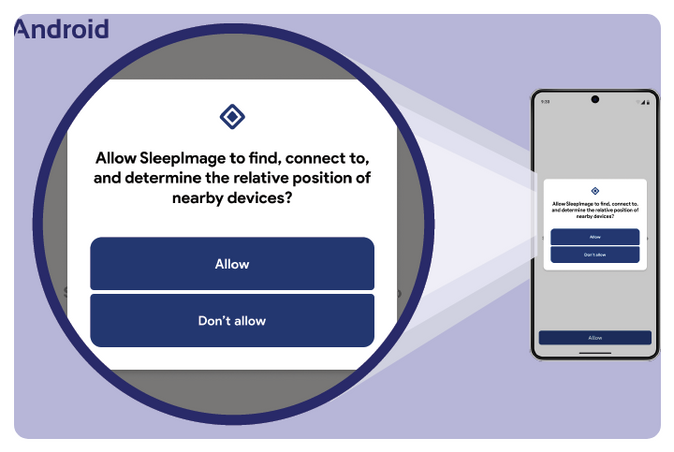
You will be prompted to provide the App permission to find nearby Bluetooth devices. This permission is needed to connect to a SleepImage-compatible recording device.
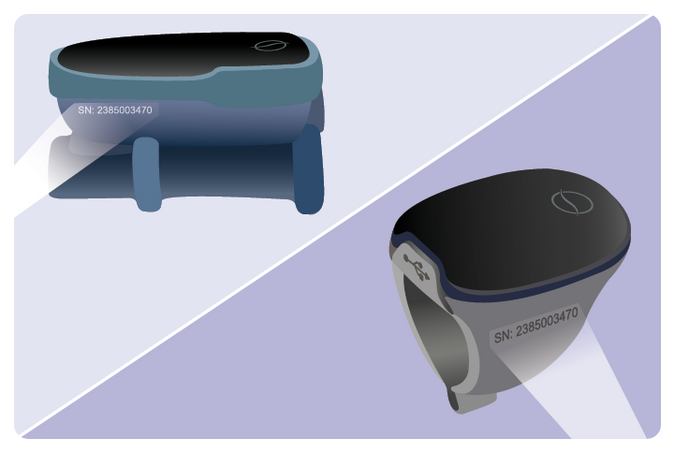
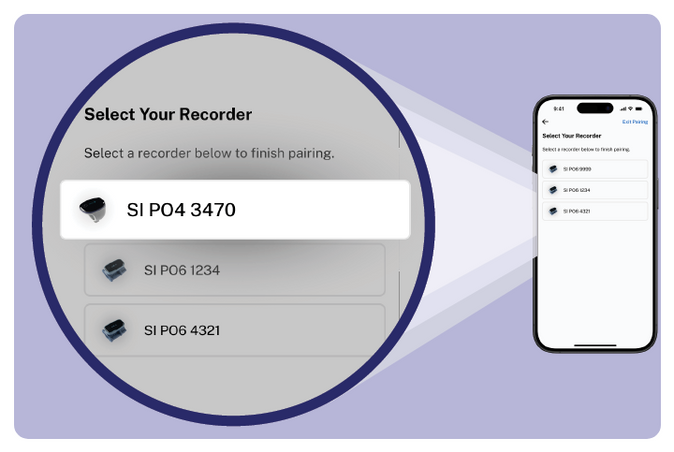
Click “Search for Recorders” to begin searching for your recording device.
Match the four digits that you see in the App with the last four digits of the serial number on the side of your SleepImage device.
Tap the corresponding entry in the App to connect your device.
When you are ready to go to sleep, it is recommended to wear the SleepImage Ring on the thumb or index finger of your left hand.
If you have other Bluetooth devices connected to your phone/tablet, disconnect them before starting the study to maximize connection stability.
4. Start Your Sleep Study
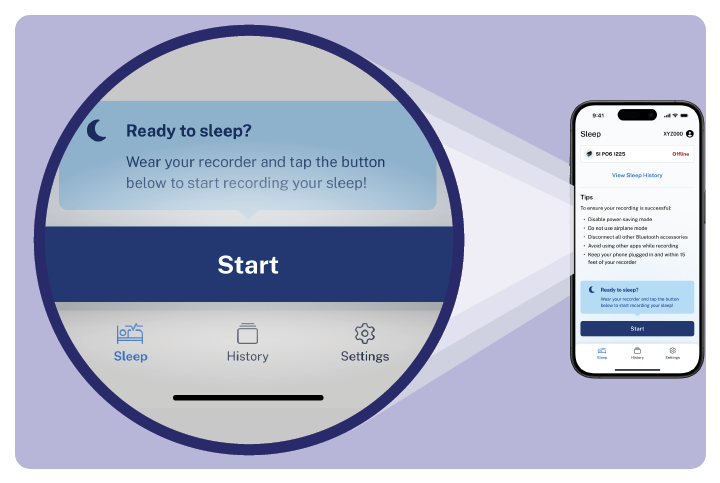
Open the SleepImage App and tap the “Start” button to start your sleep study. Keep your mobile device nearby, such as on a bedside table. Now you are ready to go to sleep.
If you need to get up during the night (for example, to use the restroom), you may temporarily remove your SleepImage device from your finger, but do not stop your sleep study in the App.

5. Complete Your Sleep Study
When you wake up, open the App and tap the “Stop” button to stop your sleep study. The App will then upload and send your study to SleepTest.com.
Do not remove the device from your finger until you have stopped your sleep study.
6. Check Upload Status in History
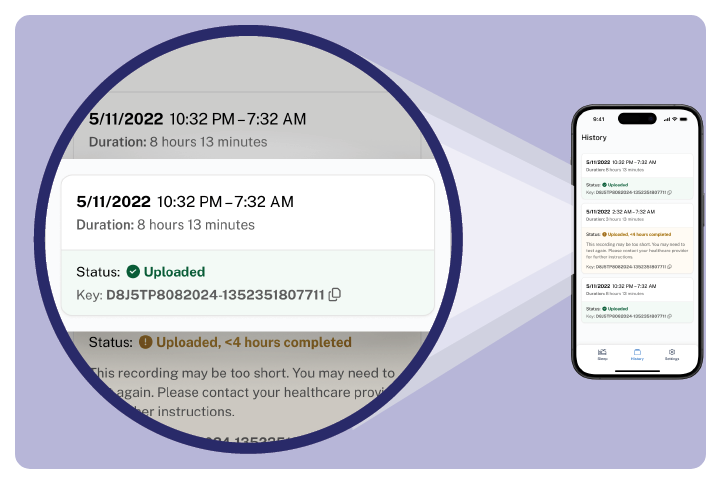
Check the upload status in the History tab of the App. Once you see the “Uploaded” status underneath your most recent study entry, you may close the App. All patients have 5 days to attempt 2 nights of testing. A minimum of 4–6 hours of recording on 1 successful night is required.
Uploading your study requires an Internet connection. Please ensure that Wi-Fi or cellular data is turned on. All patients have 5 days to attempt 2 nights of testing. A minimum of 4–6 hours of recording on 1 successful night is required.
Printable Instructions
View / Print PDF
*All patients have 5 days to attempt 2 nights of testing. A minimum of 4–6 hours of recording on 1 successful night is required. Check your “History” tab before returning.
- View Entire PDF Instructions (English)
- SleepImage Ring App "Setup" Guide (English)
- Ver Todas las Instrucciones en PDF (Español)
Download the free app from your preferred mobile device using the Apple App Store or Google Play Store. If the SleepImage app does not appear in the store on your device, make sure to search for “SleepImage” or click the store badges at the top of this page. If you still can’t find the app, the most likely reason is an incompatible Android or iOS version. In this case, please try a different mobile device (phone or tablet), if one is available in the household. See detailed instructions from SleepTest.com HERE.
Your Patient ID is your unique code, available in your SleepTest Patient Portal and also emailed to you from info@SleepTest.com. The Patient ID must be used to pair your Ring to your preferred tech.
See setup instructions HERE. iOS: If you paired a SleepImage Recorder/Ring in the phone's Bluetooth settings, unpair it first. Then, try the pairing process in the SleepImage App again. Make sure Bluetooth is enabled and that you have granted the necessary permissions to the SleepImage App. Go to Settings->SleepImage and enable the Bluetooth permission. After pressing the button with the magnifying glass icon, place the ring on your finger to "wake up" the device, and wait at least 60 seconds. Some phones take longer to discover and pair with Bluetooth accessories. Android: If you paired a SleepImage Recorder/Ring in Bluetooth settings on the phone settings, unpair it first. Then, try the pairing process in the SleepImage App again. Make sure Bluetooth is enabled and that you have granted the necessary permissions to the SleepImage App. Go to Settings->Apps->Permissions->Location and select “Allow while using the app”. Android phones will also need to have Location turned on under Settings->Location. After pressing the button with the magnifying glass icon, place the ring on your finger to "wake up" the device, and wait at least 60 seconds. Some phones take longer to discover and pair with Bluetooth accessories.
Place the Ring on your finger and give it a few seconds to wake up. The Ring will automatically start monitoring and will indicate your pulse rate on the screen or two lines. At that point, press the play button (sideways triangle icon) in the app to begin your sleep test. See setup instructions HERE.
While the thumb or pointer finger on your left hand is recommended, you may wear the ring on any finger that allows a snug fit.
Select the History tab at the bottom of the app screen. Once in the History tab, you should see the date, start time, and upload status as "Uploaded." See detailed instructions HERE. All patients have 5 days to attempt 2 nights of testing. A minimum of 4–6 hours of recording on 1 successful night is required. Check your “History” tab before returning.
The upload time is dependent on your network connection. Please leave the app in the foreground if the entries on the History tab do not say "Uploaded." If you have attempted an overnight recording per the instructions and you've confirmed your network connection, follow the instructions below: 1. Force-close the SleepImage App 2. Ensure the phone is connected to the internet 3. Open the SleepImage App. 4. Wait and look out for notifications indicating an upload attempt. 5. Go to the History tab and wait until you see the “Uploaded” status underneath your most recent study entry. If you see error messages, try switching from Wifi to Cellular or vice versa. See instructions HERE. If you're unsuccessful with the steps above, contact Customer Support by messaging us from your SleepTest Patient Portal.
